Editing text in Sitecore
In this article we'll look at the basics of editing text in Sitecore. There is also detailed information on creating links, modules and adding documents and images to the Media Library.
Finding a page
To edit a page, the first thing you need to do is find it in Sitecore. From the Sitecore dashboard, select the Content Editor button. You'll see a set of folders (the content tree) on the left-hand side.
Which type of page are you editing?
Depending on which type of page you're editing, you need to open the following folders in Content Editor:
- academic department pages: Content - Main site - Home - Departments
- Staff/Student Directory articles: Content - Main site - Articles - [Your team's folder].
- other pages: Most other pages on the website will be in individual folders under: Content - Main site - Home
Select your page
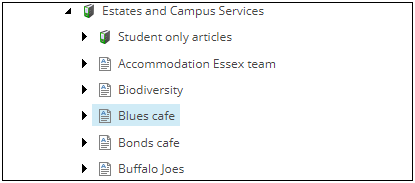
When you find the correct folder and the page you wish to edit, select the page so that it turns blue. Below is an example of Staff/Student Directory page:

Edit your page in Experience Editor
To edit the page, you need to open it in Experience Editor. To do this, select the 'Publish' tab and click on 'Experience Editor'. This opens the page in a new tab.
The page looks similar to how it appears on the website. If you hover your cursor over different parts of the content, you'll see the content is in lots of different boxes. These are called modules which can be edited.
Locking and unlocking
When you open a web page in Sitecore, you'll be automatically locked into the page and its modules when you hit save. There is no longer any need to manually lock a page or item. All pages and items are automatically unlocked overnight.
Editing a paragraph module
Most of the modules on a page are paragraph modules. To edit text in a paragraph module, click your cursor into a paragraph module box.
Now click on the pen icon in the left-hand corner of the box menu. This will bring up an editing box that you can type into (Rich Text Editor).
Copy and pasting text from Word
Copying and pasting text from Word or an email into the Rich Text Editor is problematic because it also copies all the text formatting.
So for example, as well as the text, it will often copy the font type, colour and size, and it will affect the line spacing. We need to make sure the font appears consistently across the whole website, so it’s important we take the following steps to make sure text is copied across correctly.
Pasting into an existing paragraph
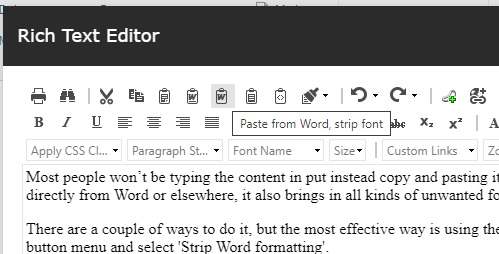
You may be familiar with some of the ways of copying and pasting text into Sitecore, such as such using the ‘Paste as plain text’ button or ‘Paste from Word’ button. These can be useful when pasting text into an existing paragraph.

Pasting new paragraphs
For new paragraphs, we can use the HTML tab at the bottom of the editor box. HMTL stands for Hypertext Markup Language and it’s used to tell web browsers how to display a web page's words.
The HTML code or tags are used to format text into paragraphs, headings, bullet points, etc. We have a pre-defined style format for our website so when we add these tags, they will show the text according to our styling. It’s a bit like pre-defined formatting styles in Word, for example.
Copying and pasting from Word into the ‘Design’ tab can override our styling, but if we paste it into HTML, all the formatting is stripped out and we can add the HTML formatting afterwards:
- copy some text from Word
- select the ‘HTML’ tab at bottom of the Rich Text Editor box

- paste the Word text in here
- to put the tags in, we go back to the ‘Design’ tab
- for a single paragraph, we can just highlight the text and using the paragraph drop down selecting ‘Normal’
If you go back to the HTML tab, you can see that paragraph tags have been added. If you want to add text with multiple paragraphs, you can paste everything into the HTML tab. Then go back to the design tab and using the cursor and the return key on your keyboard, insert the paragraphs.
To create headings, just highlight the text you want as a heading and select the relevant option from the paragraph drop down. Bullet points can also be done from the Design tab, just using the bullet list option in the menu. If you look at the HTML tab now, you see all the additional tags that have been added.
Headings
If there’s a lot of text on your page or many different topics covered, you should break up the text by adding some headings. Adding headings helps users to scan your page quickly so that they can find the relevant piece of information they need.
To do that you just highlight the words that will be the heading and then select the paragraph style drop down tool and select the heading you need.

You need to make sure your heading numbers run numerically (or nested). The page title will be heading 1, so the next heading should be heading 2 (although we do have pages that start with heading 3). The next headings should be heading 3, then 4, 5, 6 etc. You can’t have 3 then 5 for example.
Each section of the page can start again with heading 2 (or 3 depending on the page) and then all sub-headings following numerically after that.
Use of bold, italics and other text formatting
Bold and italics
Use bold and italics very sparingly. Only use them on a on a couple of key words in order to emphasise something. If you put whole sentences and paragraphs in italics or bold they lose their impact. It's also much more difficult to read than normal text.
Underline
Don't underline any text as it will look a like a hyperlink.
Capitals
Avoid writing in capitals as it's hard to read and can be read as 'shouting'.
Inserting a table
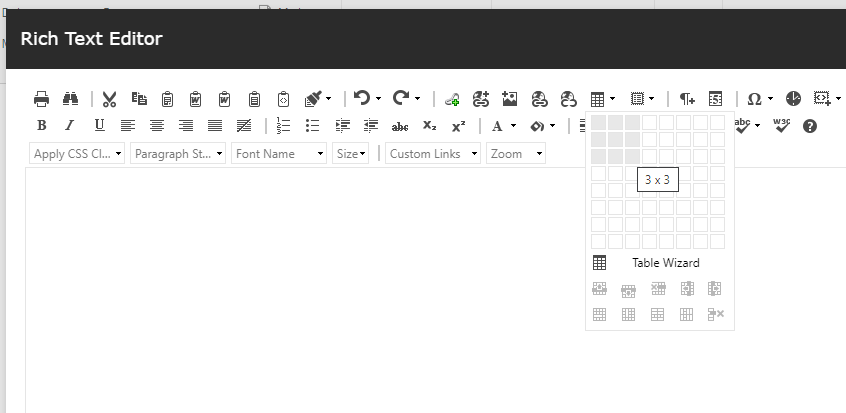
Tables can be inserted into web pages using the Insert Table button. You then just use your mouse to select how many row and columns you need.
Remember that our web pages will be viewed on mobile devices as well as PCs. You can have as many columns as you need because the tables reformat, but you need to think about layout (merged cells don't work for example). Generally it's a good idea to have as few columns as possible.
On a mobile tables go into a different view with the titles of each table column appearing on the left, each column in the table becoming a row and each row of the original table spanning multiple rows.
It's important to check what your table looks like on mobile to make sure it still appears correctly.

On a PC the first row of the table will be automatically formatted into the column heading style (white text on black background) which can't be changed. The heading style doesn't appear on mobiles. Here's an example:
| Item | How long to keep it for | Notes |
| Academic Section staff files | Termination of relationship + 2 | The main staff file is held in HR |
| Student Legal cases | Resolution of dispute + 6 | The Registrar and Secretary's Office holds permanent copies |
